LID/MAF/K&N
E-mail jmX with corrections
|
|
DirectFlo / GMAF / K&N Air Filter
The Parts we'll be installing:
|

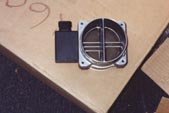
Granatelli Motorsports MAF
|

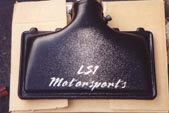
LS1 Motorsports Directflo Lid
|
How I installed them:

|
First off, I started with a stock engine. Ah..look at the LS1 in all of its stock glory. The first
step during most car work is to unhook the the battery (just disconnect the black wire).
Then unlatch the metal clips at the front of the airbox. They are shown "unlatched" in this photo.
|

|
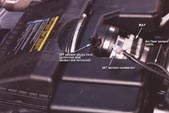
Next, disconnect the IAT sensor plug. (click pic for labeled parts) Note, where the hole is in the photo is where the actual
sensor will be, and the plug shown just attaches onto the end of it.
|

|
Then you will need to disconnect the MAF sensor plug...it just unclips like the IAT sensor connector. Loosen the collar that connects
the tube from the MAF to the throttle body. At this time, I also loosened the eliptical collar that connects the air lid to the MAF to
allow room to "wiggle" the parts out if needed. This can probably be omitted. All of these parts are labeled in the picture to the left.
On 2000 Model cars, you will also need to disconnect the hose that is plugging into the side of the big bulbous air silencers. This
is not shown in the picture, but it on the drivers side silencer. You *must* have a filter that plugs into the end of the hose. The K&N part # you want is
62-1030. The filter was probably provided with your lid and now would be a good time to plug the filter in.
|

|
Next remove the whole intake system from the car. This starts at the begining of the lid, all the way back to the tube connected
to the throttle body. Just leave all the parts inbetween connected together. If you aren't sure what to remove, see the picture to
the left. That is what you are going to pull out.
|

|
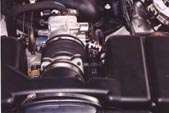
Now your engine should look like this. If you also need to install the K&N filter (part # 33-2118), go ahead and do it now. The picture already has the
K&N in place. *NOTE* Do not let ANYTHING get into the throttle body, some people will stuff a rag into the opening just to make sure
nothing gets in there...I just made sure nothing fell in and hurried installing the rest of the parts to keep it from being unprotected
for a long period of time.
|

|
Now, take the mass of stuff you just removed and loosen the short tube extending off the *BACK* of the MAF. Make sure you
pay attention to how this tube/collar are attached to the stock MAF, as you'll want to reattach it to the GMAF in the EXACT same
position. You can now put the massive MAF/Silencers/Lid combo away for safe keeping.
Now attach the tube to the rear of your new GMAF, making sure you attach it just like it came of the stock MAF. The rear collar
that will tighten to the throttle body should have the tightening screw facing up (like it was when you loosened it), so you can
retighten it later easily.
Next you'll need to remove the IAT sensor and rubber grommet from the stock air lid/silencers. I disconnected the lid from the silencers (loosen the eliptical collar),
and then pushed the sensor and grommet out. This was a long a grueling process but after a little pushing, tugging, and swearing it'll come right out. Had I known the difficulty before hand,
I would have ordered a new grommet (GM Part # 24504388) and sensor (GM Part # 12160244)
from gmotors.com. I'd recommend ordering them no matter what, since you'll probably want to leave a set on the
old stock intake stuff, just incase you need to quickly swap to stock parts for some reason. Now, insert the grommet and sensor into your new Directflo lid..you'll see the hole
that it plugs into, and the grommet/sensor should go in much easier than they came out.
Now, attach your Directflo lid to the front of the GMAF, but don't tighten the collar down yet. You should now have something that resembles
the picture to the left. Put the rubber gasket that was provided with the lid on the inside of the lid now. This will aid in sealing
your intake, thus keeping out any possible unfiltered air.
|

|
Well, you are 75% done now. Just take your new lid/maf piece, hook the tube coming off the back of the GMAF back to the throttle
body, and try to snap the new lid into place. This will be very difficult at first, as the lid is a tight fit. Just make sure you
can clamp down the metal clamps..if you can, its probably seated correctly.
Now, tighten the collar connecting the lid to the GMAF, and then tighten the collar connecting the GMAF tube to the throttle body. Make
sure all these connections are good and tight...if air leaks in between these connections, you could cause serious damage to your
engine. Next, if you have a 2000 model, tie down that air tube you disconnected earlier (the one you stuck an air filter in the end of). You can
see where I tied mine down in the picture on the left. If you omit this step, the tube will fly around your engine compartment and could cause damage.
Finally, go ahead and reconnect the MAF sensor cable to your new gmaf, and reconnect your IAT sensor cable to your IAT sensor. Double check everything,
and you should be ready to reconnect the battery cable and start the car! Remember, if your battery has been disconnected for an extended
period of time (which it should have been by the time you are done with the install) your computer will need to relearn some ratios. Just let the car
idle for 10 minutes or so, then slowly rev it a few times. After that, you should be set to go!
|
The Parts you'll have left over:

All the old parts
|

The old MAF (notice blockage)
|

The old MAF (notice the screen)
|
After putting the direct air-flow lid and K&N on, I noticed quite an improvement in
acceleration and top end on the car. This mod was really worth it. I later installed the GMAF,
but didn't notice much of a gain. I'm sure that these intake mods will make more horsepower for
me later on when coupled with a new cat-back exhaust system. I also didn't reset the computer when
I did the GMAF, so gains may have gone unclaimed during my "test". I have since reset it.
All content provided on this site is to be used as a suggestion only. Any damage to the vehicle or injury resulting from usage of these materials is 100% the users responsibility. Use of a professional mechanic is suggested if you do not feel comfortable with the instructions. Reproduction of any photography, work or otherwise herein is expressly prohibited without written permission from the publisher
2004 - jmX - All Rights Reserved.


